Prerequisites
To follow along, ensure you have:
- Node.js v20 installed
- Angular CLI v18.2.19 (or later)
Once Node.js is installed, you can proceed to install Angular CLI.
Step 1: Install the Angular CLI
To install the Angular CLI globally using npm, open a terminal or console window. If you're using Windows, macOS, or Linux, the following command works the same way:
npm install -g @angular/cli
This process might take a few moments as the necessary packages are downloaded and installed.
Step 2: Create a New Angular Project
Create a new folder for your project (e.g., TestAngularDefer ) and navigate into it. Open a terminal and execute the following command to scaffold a new Angular project:
ng new TestAngularDefer
Step 3: Structuring the Application for Performance with Angular defer
After setting up your Angular application, the next steps involve organizing components and routes effectively to lay the groundwork for leveraging Angular's defer capabilities. This section walks you through setting up a clean layout and modular structure.
Step 4: Remove the Default App Content
By default, Angular includes sample HTML in the AppComponent. To prepare for a routed layout:
- Open app.component.ts.
- Replace the existing template code with the following:
<router-outlet></router-outlet>
This enables Angular’s router to display components based on the current route.
Step 5: Generate Project Components
Use Angular CLI commands to scaffold the necessary components. Open a terminal in your project directory and run the following:
ng new TestAngularDefer
Run ‘ng g c layout’
Run ‘ng g c layout/header’
Run ‘ng g c layout/footer’
Run ‘nx g c components/home’
Run ‘nx g c components/about’
Run ‘nx g c components/services’
Run ‘nx g c components/spinner’
These components will be used to structure your application pages and layout.
Step 6: Create the Layout Structure
In layout.component.ts, import the necessary components and Angular's RouterOutlet:
import { Component } from '@angular/core';
import { HeaderComponent } from './header/header.component';
import { FooterComponent } from './footer/footer.component';
import { RouterOutlet } from '@angular/router';
@Component({
  selector: 'app-layout',
  standalone: true,
  imports: [HeaderComponent, FooterComponent, RouterOutlet],
  templateUrl: './layout.component.html',
  styleUrl: './layout.component.css'
})
export class LayoutComponent {}
Now, update layout.component.html to define the layout structure:
<app-header></app-header>
<router-outlet></router-outlet>
<app-footer></app-footer>
This wraps your routed views with a consistent header and footer layout.
Step 7: Configure Application Routing
Update your app.routes.ts file to define application routes. This includes a default redirect and a nested route under the layout component:
export const routes: Routes = [
    {path:'', redirectTo: '/home', pathMatch:"full"},
    {path:'', component:LayoutComponent, children:[
        {path:'home', component: HomeComponent }
    ]}
];
Step 8: Enhance the Home Component
To give the home page meaningful structure, include the About and Services components in home.component.html:
<app-about></app-about>
<app-services></app-services>
Step 9: Apply Global Styling
Add the following styles to styles.css to provide consistent layout and visual separation for each section:
*{
box-sizing: border-box;
}
.box{
    border:2px solid black;
    padding: 30px ;
    vertical-align: middle;
    text-align: center;
    color: black;
    text-shadow: 1px 1px 3px 4px white;
    font-size: x-large;
    font-weight: 900;
}
Step 10: Style Section Components
Within each component’s HTML (header, footer, about, services), add a div element with styling classes:
<div class="box header">
    Header
</div>
In the component’s corresponding CSS (e.g., header.component.css), define the .header class:
.header{
    background-color: #2b6777;
    height: 150px;
}
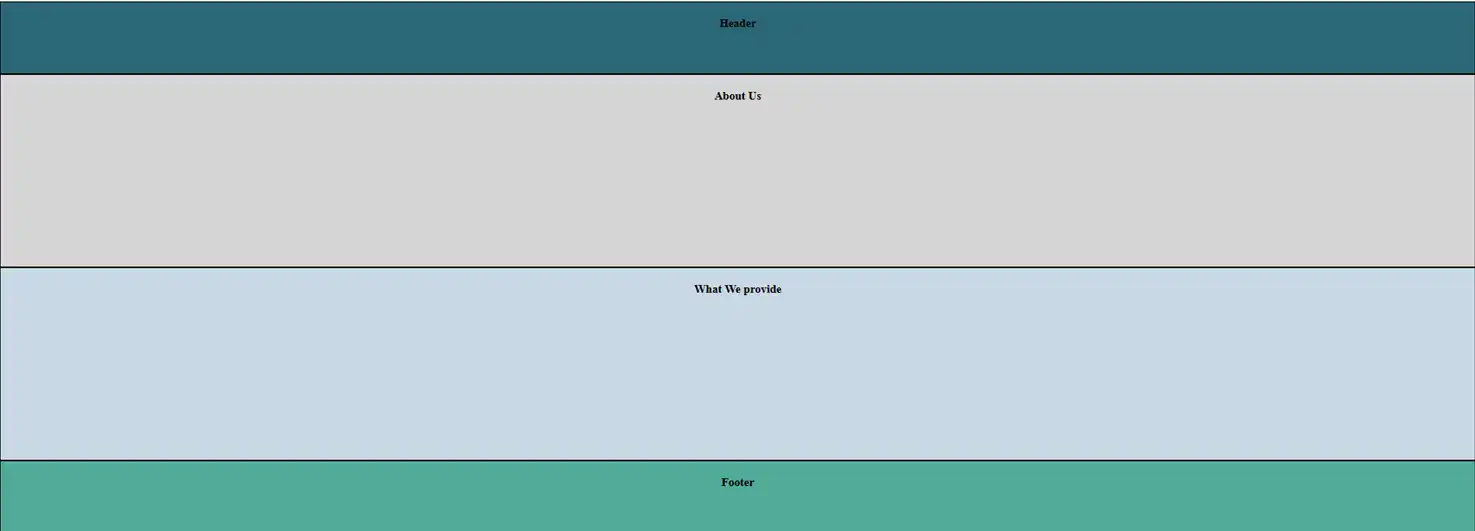
Repeat similar styling patterns for the other sections like footer, about, and services to maintain design consistency. It show as below
Step 11: Enhancing Performance with @defer
Angular's @defer syntax introduces a powerful way to load components conditionally only when they are truly needed. This reduces the size of the initial bundle, speeds up load time, and improves overall application performance.
How @defer Works
You can defer the loading of a component until a specific condition is met such as scrolling, interaction, or visibility in the viewport. Here’s how it looks in practice:
<app-about>/app-about
@defer{
<app-service></app-service>
}
This tells Angular to package the component into a separate JavaScript bundle, loaded only when needed. You'll notice a separate chunk in the build output representing this deferred content.
Step 12: @defer with a Placeholder
Angular also allows you to show a placeholder while the deferred component is being loaded. Update your layout.component.html as follows:
<app-header></app-header>
<router-outlet></router-outlet>
@defer{
<app-footer></app-footer>
} @placeholder {
  <div class="box">Loading...</div> }
The loading panel looks like this.
You can enhance user experience by setting a minimum duration for the placeholder to ensure smoother transitions:
@defer{
<app-footer></app-footer>
} @placeholder (minimum 4s) {
  <div class="box">Loading...</div> }
Step 13: @defer with a Loading Spinner
Angular’s @loading block allows you to show content as soon as the deferred bundle begins loading. Here's how to implement it using a custom SpinnerComponent.
HTML for Spinner
<div class="spinner-box">
    <div class="spinner"></div>
</div>
CSS for Spinner
.spinner-box{
    width: 100%;
    height: 100%;
	padding: 40px;
}


.spinner{
    height: 30px;
    width: 30px;
    border-top: 3px solid grey;
    border-radius: 50%;
    animation-name: round;
    animation-duration: 1s;
    animation-iteration-count: infinite;
    margin: auto auto;
}
@keyframes round{
    from{transform: rotate(0deg);}
    to{transform: rotate(360deg);}
}
Usage in layout.component.html
@defer{
<app-footer></app-footer>
} @loading {
  <app-spinner></app-spinner>
}
You can also add a minimum duration:
@defer{
<app-footer></app-footer>
} @loading (minimum 2s) {
  <app-spinner></app-spinner>
}
Output looks as below:
Step 14: Handling Errors with @defer
Angular also supports the @error block to gracefully handle issues when a deferred component fails to load:
@defer{
<app-footer></app-footer>
} @error {
  <div class="box">Error Occurred...</div>
}
This ensures that users are informed rather than facing a broken layout or missing content.
Step 15: Triggering @defer Load with Conditions
You can control when Angular should begin loading a deferred block using specific triggers:
Available Triggers
1.Idle: Loads after browser finishes loading all other resources.
@defer{
<app-footer></app-footer>
}
2.Viewport: Loads when the component becomes visible in the viewport.
@defer (on viewport){
<app-footer></app-footer>}
3.Interaction: Loads after a user action like clicking or typing.
@defer (on interaction){
<app-footer></app-footer>}
4.Hover: Loads on mouse hover.
@defer (on hover){
<app-footer></app-footer>}
5.Immediate: Loads immediately, but still in a separate chunk.
@defer (on immediate){
<app-footer></app-footer>}
6.Timer: Triggers loading after a specified delay.
@defer (on timer(500ms)){
<app-footer></app-footer>}
These triggers give you fine-grained control over how and when resources are loaded, optimizing performance for different user behaviors.
Step 16: Measuring the Performance Gains
Once @defer is implemented, the benefits become visible in your build artifacts and loading performance.
Key Metrics to Observe
- Initial Bundle Size: Reduced by moving non-essential components like Services and Footer into separate bundles.
- Load Time:Smaller bundles mean faster download and execution, improving First Contentful Paint (FCP) and Time to Interactive (TTI).
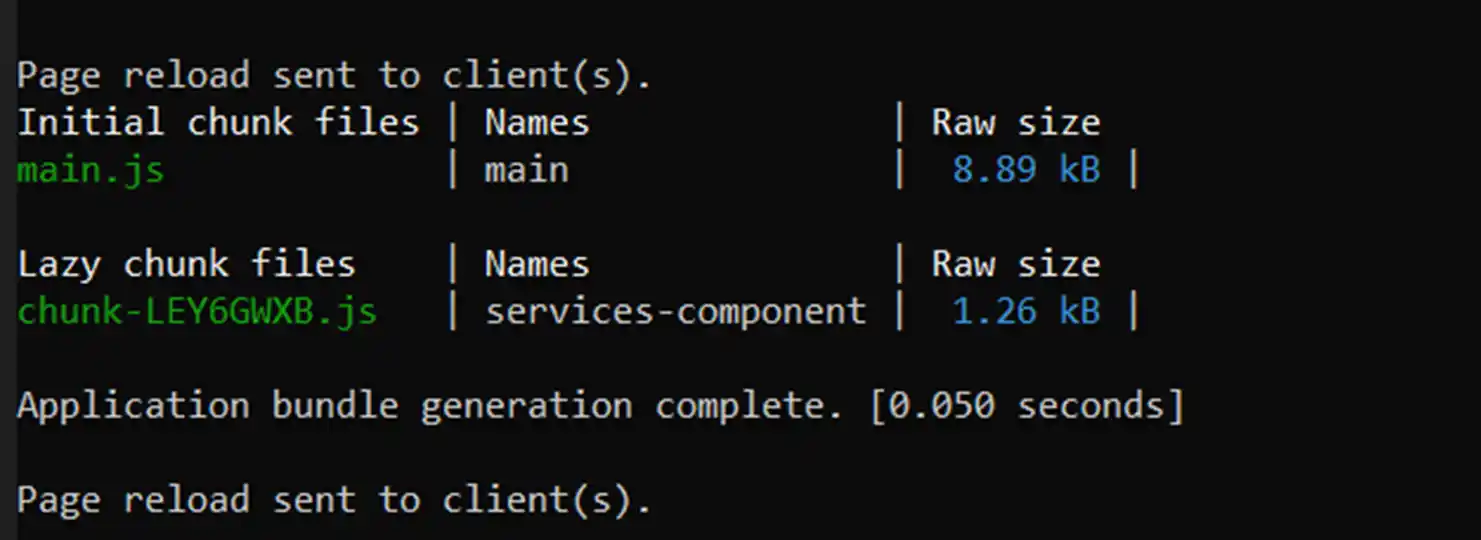
- Deferred Chunks: In the Angular CLI build output, you'll see new JavaScript bundles created for deferred components.
By deferring components, Angular loads only what’s necessary up front, allowing users to start interacting with the app sooner.
Conclusion
The @defer syntax in Angular provides a powerful, declarative way to boost application performance. With support for loading strategies, placeholders, spinners, error handling, and trigger-based rendering, it ensures a smoother user experience and optimized loading behavior.
Incorporating @defer into your Angular projects is an essential step for building scalable, high-performance applications that deliver faster, lighter, and smarter user experiences.
Checkout Detail video here