Build a CRUD GraphQL API with Next.js (App Router) - Without Apollo or Yoga
Introduction
When you think of APIs, REST usually comes to mind: multiple endpoints like /api/posts, /api/posts/:id, or /api/posts/:id/edit. But with GraphQL, you don’t need several endpoints - a single /graphql endpoint is enough, and the client specifies exactly what data it needs. This flexibility makes GraphQL a powerful alternative for modern applications. In this guide, we’ll walk through how to build a CRUD GraphQL API with Next.js App Router using only the official GraphQL package - no Apollo, no Yoga. You’ll learn how to set up a schema, create resolvers, and implement a clean /graphql route, along with a simple UI for creating, reading, updating, and deleting posts. If you’ve been searching for a straightforward Next.js GraphQL tutorial, this step-by-step walkthrough will give you everything you need to get started.
For example, instead of sending multiple REST requests, you can send one GraphQL query:
query {
  posts {
    id
    title
    content
  }
}
The server returns exactly that data, nothing more, nothing less.
In this, we’ll build a CRUD (Create, Read, Update, Delete) GraphQL API inside a Next.js App Router. We'll use the official graphql package only - no Apollo, no Yoga. Data will be stored in memory (for demo purpose).
Step 1: Create a new Next.js app
We will use typescript here,
npx create-next-app@latest next-graphql-crud --typescript
cd next-graphql-crud
Step 2: Install GraphQL
We only need one dependency: the official graphql library.
npm install graphql
Step 3: Define the GraphQL Schema and Resolvers
Create a new folder called lib/ inside root directory, create a file called schema.ts.
All are handled by the single /api/graphql endpoint.
Now run below command in terminal,
npm run dev
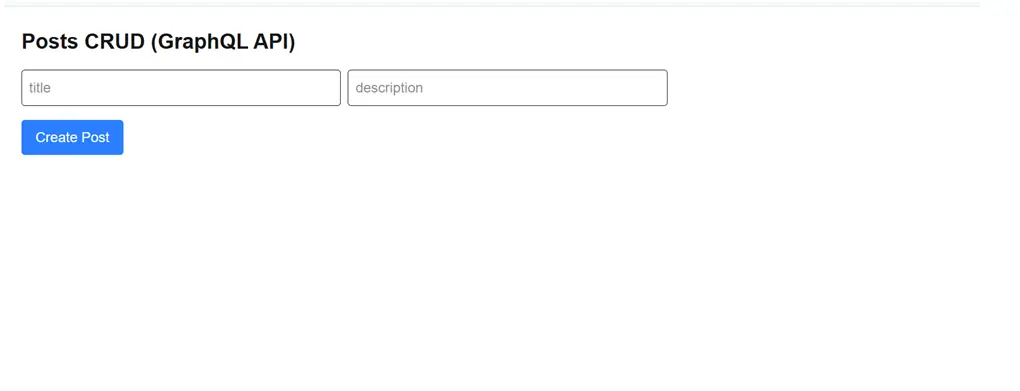
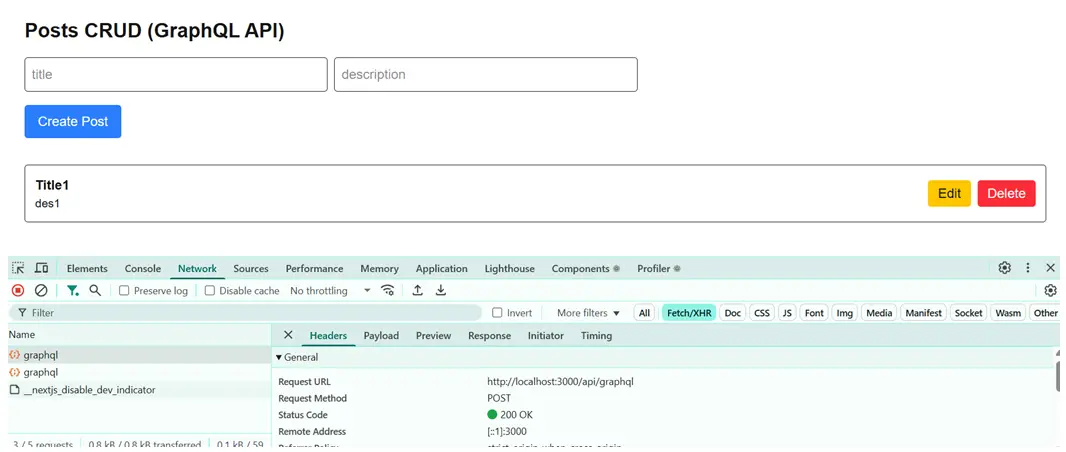
Here is how our UI will look,
Add new post
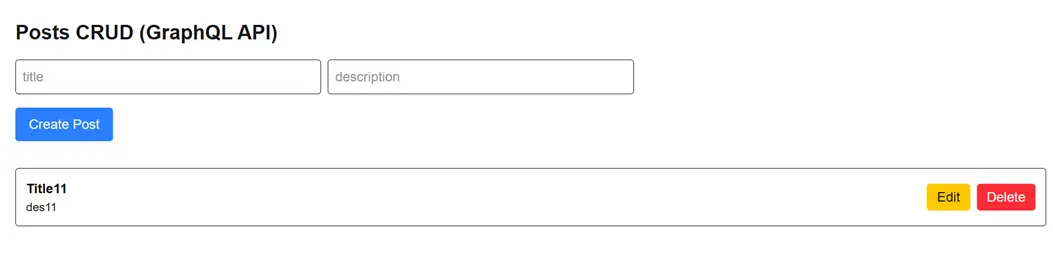
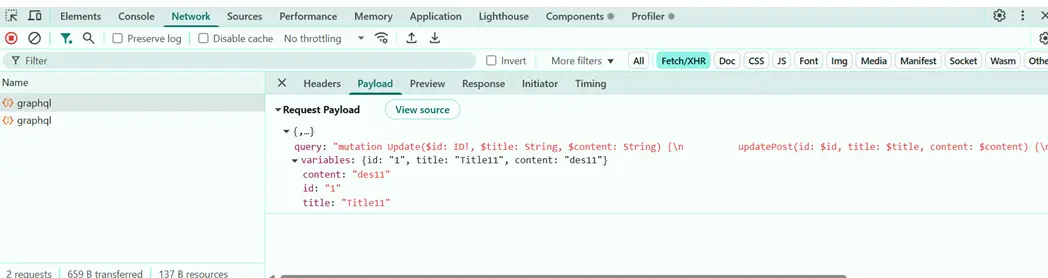
Update post
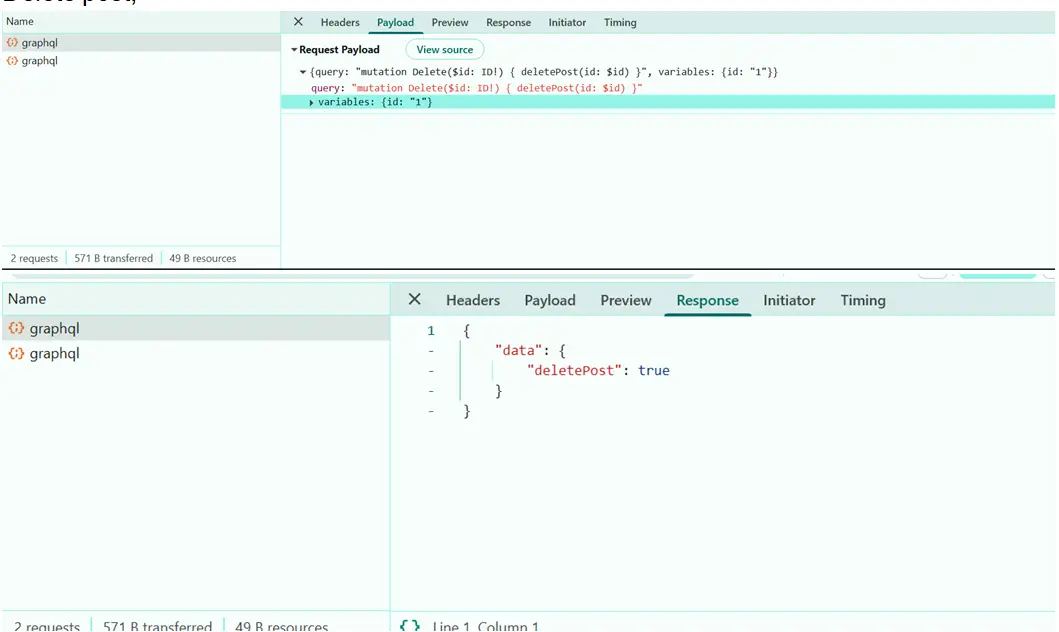
Delete Post
Need Expert Help with Next.js & GraphQL Development?
Building a scalable GraphQL API or a production-ready Next.js application can get tricky, especially when you need to handle advanced features like authentication, database integration, or performance optimization. That’s where Prishusoft comes in. With years of expertise in Next.js, GraphQL, and modern web development, our team delivers tailor-made solutions for startups, enterprises, and everything in between. Whether you’re looking to build a custom CRUD GraphQL API, migrate an existing REST API to GraphQL, or develop a full-featured Next.js app, we’ve got you covered.
Ready to bring your project to life? Contact Prishusoft today for professional development services that save you time, reduce costs, and accelerate your product launch.
Get in touch with Prishusoft – your trusted partner for custom software development. Whether you need a powerful web application or a sleek mobile app, our expert team is here to turn your ideas into reality.